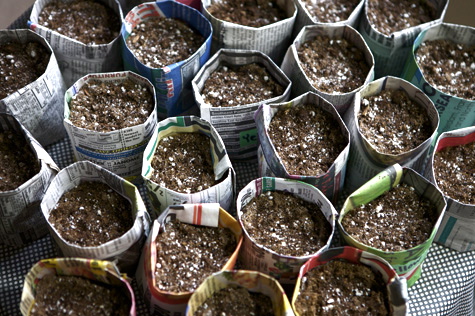
Okay, this is my new favorite project. I’m so excited to share it with you! It’s easy, it’s practical, and it’s just so very Earth-friendly. ¡Qué bueno!
Fellow farmers, this is hands-down the best way to start your spring seeds indoors. These individual containers are the perfect size for a sprout, and come garden time, there’s no stressful transplanting. When the seedling is ready for the outside, simply open up the bottom of the newspaper pot and drop the entire thing into the ground. There’s no plastic containers involved, the newspaper will biodegrade in your garden, and your wee plant will never be uprooted. So, ready to get folding? You’ll need a stack of newspaper and a standard soup can. Here’s what you do:
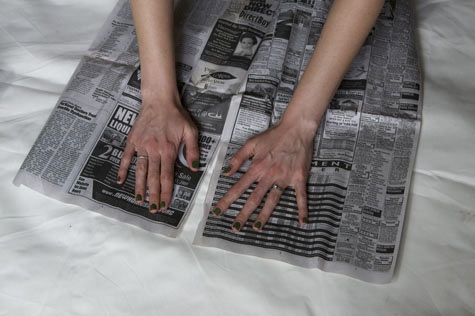
Spread out a full sheet of newspaper and then carefully split it in half, along the crease.
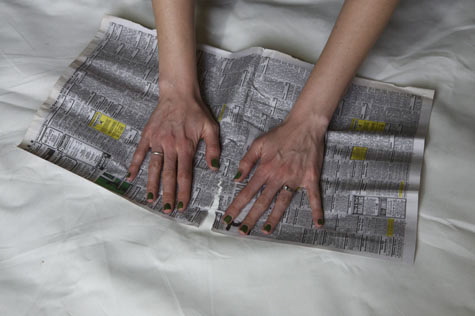
Take one of the halves and carefully split it in half again, along the other crease. You will end up with one quarter of a whole newspaper sheet.
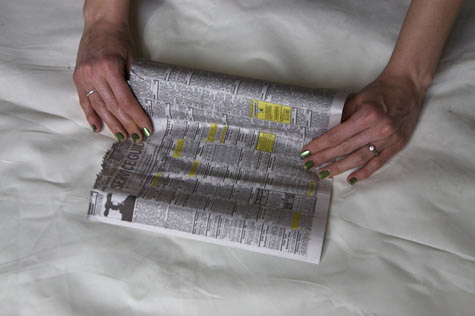
Orient your sheet so that it is taller than it is wide, and then fold the bottom edge up to the top.
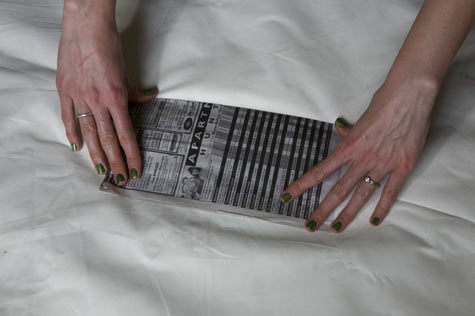
Your sheet has now been folded in half to make a rectangle. Press along the bottom to make a tight crease.
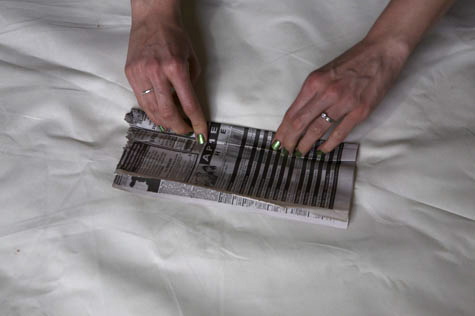
Along the bottom of the rectangle, fold the creased edge over about an inch to make a small flap. Press along the edge to make it nice and tight.
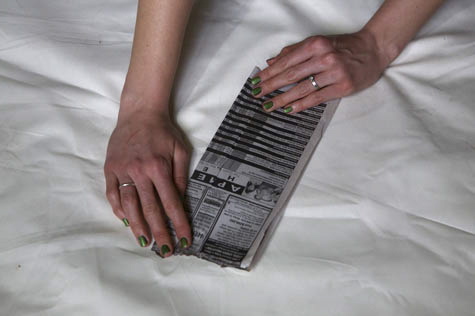
Turn the paper so that it is now facing you lengthwise.
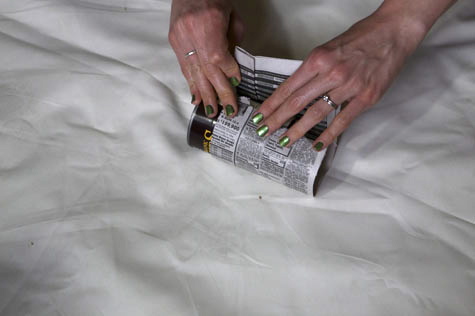
Lay your can on the newspaper so that it hangs over the edge of the folded side (over the flap). Wrap the newspaper around the can until it overlaps itself.
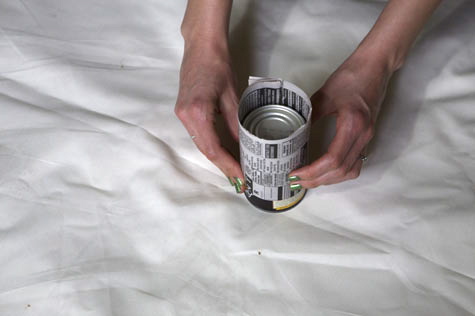
Keeping your fingers on the seam to prevent it unwrapping, turn the can on it’s end.
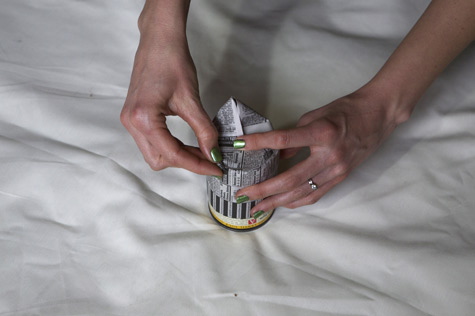
Continuing to hold the seam with one hand, begin folding down the excess newspaper to create a bottom. I usually fold it down in four flaps. It may take a few tries to master this part, but eventually you will be able to get a flat, solid bottom.
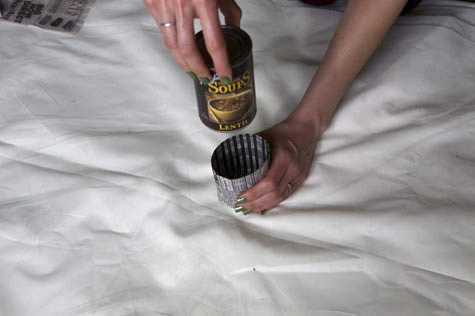
Flip the can over and carefully wiggle it out of the newspaper pot. Don’t forget to keep holding that seam!
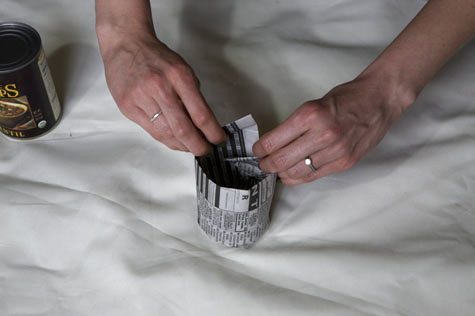
Now, where the newspaper overlaps itself, one end will be on the ‘outside’ and one end will be on the ‘inside’. On the ‘outside’ piece, gently lift that one-inch flap up.
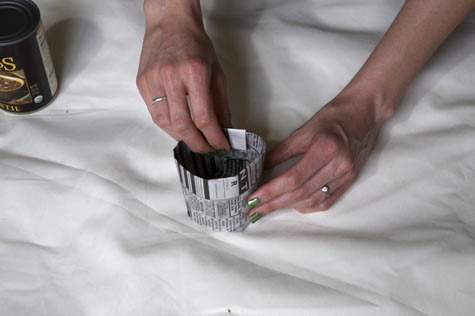
Fold the ‘inside’ end under the flap, and tighten up that seam.
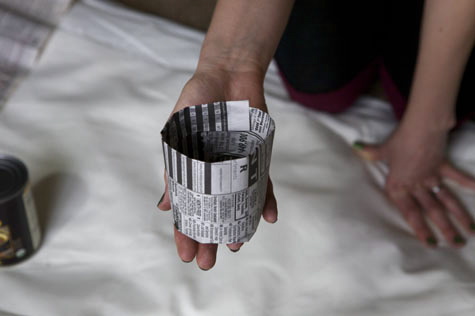
Voilà! She is a seed pot!
That’s all there is to it! Just start your seeds as normal in their individual pots. Don’t forget to label them (I used green tape and a sharpie), and make sure to open up the bottoms before you put them in the ground, to allow their roots to extend.
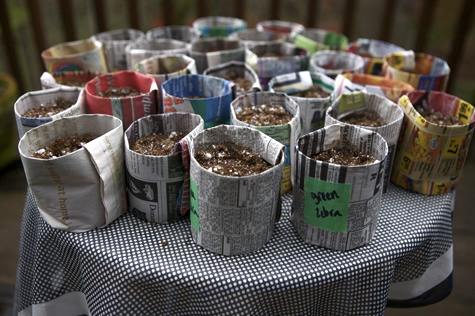
Happy gardening!



Pingback: Organic Gardening Green Diva Style | Feelgood Style
Pingback: Organic Gardening Green Diva Style – Feelgood Style : My Website / Blog
Pingback: Home Sweet Frugal Home – March — A Cultivated Nest
Pingback: April 10, 2013 | Mommy plus 5
Pingback: Designer MacGyver: 7 Clever Newspaper Crafts |
Pingback: Uses for Newspaper | WONDERMOM WANNABE
Pingback: Not Far From The Tree » Blog Archive » Ladies and Gentlemen, Start Your Gardens! Pt. 1
Pingback: Semilleros hechos con papel de periódico Cultura DIY
Pingback: Fearless Gardening | Boomerings
Pingback: Grow Your Own – Sustainable Seedlings | Green4All Blog
Pingback: Einfache DIY nachhaltige Setzlinge für Gemüse- und Kräutergärten – Ökologisch leben