Many novice growers don’t realize that gardening is a year-round process. Even here in the Pacific Northwest, where we experience the dramatic cycle of four separate seasons, there is winter work to be done. And although January might be reserved for drawing up plans and researching plants, February marks the exciting transition to hands-on action!
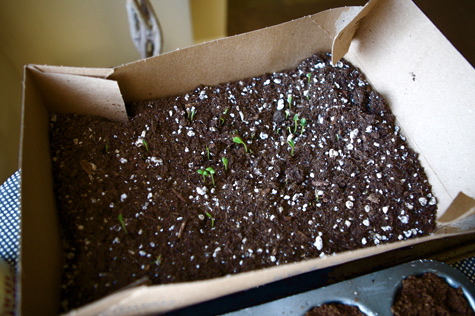
In cooler climates like mine, that means starting your hardiest and earliest-bearing seeds indoors. I just began my first seed starts last week, and already little Zinnia buds are happily poking their way up and out, shaking off their cotyledons and clamoring for sunlight. If growing your plants from seeds sounds like a daunting task, rest easy – this is pretty straightforward stuff. Here’s my top 10 list of tips and tricks for starting your own seeds:
1) You’re not going to want to just plunk some seeds down in any old dirt – not in any dirt at all, in fact. Starter mix contains no soil, ensuring that it’s free of bacteria and competing seeds. The composition also allows for maximum aeration (air flow), which is ideal for delicate seedlings that are susceptible to mold and mildew. You can buy pre-made starter mix, or you can make your own. I make my own (of course!), and use a simple combination of 1 part perlite to 2 parts peat moss.
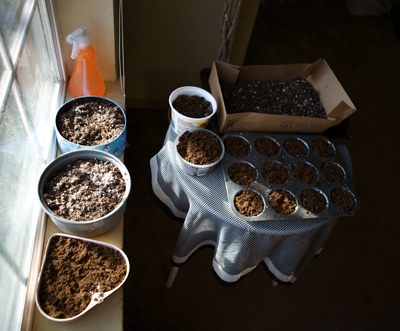
2) You really don’t need any fancy partitioned seedling containers. Just do like I do and get funky with a little creative repurposing. Right now I’m using a cardboard box (on a baking tray to catch excess water), an old muffin pan that was past its prime, a heart-shaped cake pan in the same condition, the insert from my last rice cooker, an old Christmas cookie tin, and a couple of plastic food tubs (Earthbalance™ and Tofutti™, eh?). You can really use anything here – some people even use newspaper, folded and fashioned into little pots. Get creative, and think outside the box!

3) Don’t forget to label your containers! I usually just stick the seed packet to the side of the container, but masking tape and a sharpie works just as well.
4) So you’ve procured your starter mix and you’ve secured (and thoroughly washed) some containers. Now it’s time to plant. A rule of thumb for setting seeds is to plant them at a depth 3-4 times their thickness. That’s 3-4 times their diameter if they’re round, or 3-4 times their width (not length!) if they’re slender. You’ll want to fill your container with starter mix and then tamp it down a bit. Then you’ll sprinkle the seeds, dropping a good liberal dose that can be thinned out later. Finally, cover them with the appropriate amount of starter mix. And voila! You’re a gardener!
5) Now that your babies are planted, you’re going to want to do everything in your power to help them grow. First things first, get thee to a south-facing window! If you have no south facing windows you can make do, but really, south is optimal in a majorly important way. Move furniture if you must, but get those seeds under a southern window. If not south, west is your next best option. If you have north or east facing windows, choose low-light plants and supplement light with a grow bulb.
6) So, set your seedling pots in as much direct sunlight as possible, and rotate them daily to help them grow up straight. If you can, place a lamp or light bulb near them for additional light. They will love you for it.
7) Seedlings like nice, warm soil, so give them what they want! I place my seed table right near a heat vent, which is ideal. A good source of heat from below – even a lamp – will help keep your seedlings nice and cozy.
8) If you are still worried about warmth, you can loosely cover your containers in plastic wrap. This is an easy way to create a miniature greenhouse (cute!) and trap in heat and moisture. Just make sure to remove the plastic once your seed is a sprout.
9) Give them plenty of water. Don’t drown them, but do make sure they are well taken care of. I sprinkle my seedlings daily, and also keep a squirt bottle on hand. I give them a nice misting every few hours to keep them comfortably moist. Once they are sprouted you can water them less. If the soil is soggy, give them a 24-hour break. Too much water risks damping off disease, root rot, and a number of other deadly afflictions. So be attentive, but not too attentive!
10) Once your seeds are sprouting, make sure the soil remains aerated by stirring the surface every so often. You can use a fork or toothpick or other tool of your choice. Just be ever-so-gentle. You can also remove your extra heat source once the seedlings are in grow mode.
And then you’re off! Good luck, and happy gardening!


Pingback: 20 Frugal, Repurposed Seed Starting Containers - The Free Range Life